
Blog
Restoring Damaged Ceilings To Original Condition

Restoring Damaged Ceilings To Original Condition: A Technical and Aesthetic Guide
In the world of interior design and property maintenance, the ceiling is often referred to as the “fifth wall.” While walls and floors receive the majority of a homeowner’s attention, the ceiling plays a crucial role in light distribution, acoustics, and the overall structural integrity of a room. However, because ceilings are subject to gravity, temperature fluctuations, and hidden plumbing networks, they are highly susceptible to damage. From minor hairline cracks to significant water-induced collapses, restoring a ceiling to its original, pristine condition requires a combination of engineering knowledge and artisanal skill. This article provides a comprehensive exploration of the methods used to diagnose, repair, and finish damaged ceilings.
The Anatomy of Ceiling Failure
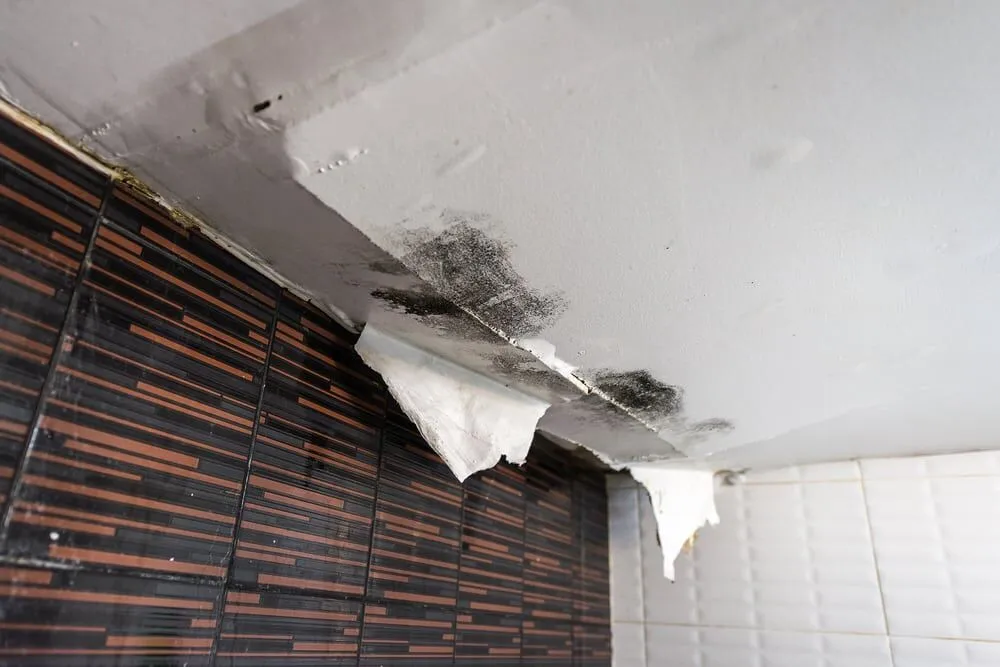
Understanding how to fix a ceiling begins with understanding why it failed. Ceiling damage generally falls into three categories: moisture-related, structural/mechanical, and age-related degradation. Water damage is perhaps the most common, resulting from roof leaks, burst pipes, or overflowing fixtures in the floor above. Moisture weakens the gypsum core of drywall or the bond of plaster, leading to sagging, staining, and eventually, structural failure.
Structural damage occurs when the house settles or when the joists above the ceiling shift. This often manifests as long, straight cracks or “nail pops,” where the fasteners are pushed out of the drywall. Age-related issues are more common in older homes with lath-and-plaster ceilings, where the “keys”—the bits of plaster that hook around the wooden lath—become brittle and break over time, causing large sections of the ceiling to pull away from the framing.
The Diagnostic Phase: Identifying the Root Cause
A professional restoration never begins with a patch; it begins with a diagnosis. If a ceiling is stained or soft, the source of the moisture must be identified and rectified before any repair is attempted. Patching a ceiling while a pipe is still leaking is a futile exercise that will lead to mold growth and secondary failure. Professionals often use moisture meters to ensure the substrate is completely dry (usually below 12% moisture content) before beginning work. Furthermore, if a ceiling is sagging significantly, a professional must determine if the drywall has simply pulled away from the nails or if the wooden joists themselves are bowing, which would require structural shoring.
Safety Protocols and Asbestos Awareness
Ceiling repair presents unique safety challenges. Working overhead for extended periods increases the risk of falls and neck strain. Furthermore, the dust generated from sanding ceiling compounds is finer and more pervasive than wall dust. Most critically, for homes built before the 1980s, “popcorn” or textured ceilings may contain asbestos. Before scraping or sanding any textured ceiling in an older home, it is mandatory to have a sample tested in a laboratory. If asbestos is present, a certified abatement team must handle the restoration to prevent the release of toxic fibers into the air.
Modern Drywall Ceiling Repair Techniques
For most modern homes, ceilings are constructed from 1/2-inch or 5/8-inch drywall. Repairing a hole or a water-damaged section involves several precise steps:
- Squaring the Damage: The irregular damaged area is cut into a neat rectangle using a drywall saw. This makes it easier to fit a new piece of material.
- Installing Backing: If the hole does not align with the ceiling joists, “cleats” or backing blocks made of scrap wood are screwed into the existing drywall to provide a solid surface for the new patch to attach to.
- The “California Patch”: For smaller holes, some professionals use a “butterfly patch,” where the paper backing of the drywall patch is left larger than the gypsum core, acting as its own tape.
- Taping and Mudding: The joints between the new and old drywall are covered with fiberglass mesh or paper tape. High-quality joint compound is then applied in progressively wider layers.
Restoring Historic Plaster Ceilings
Plaster restoration is a specialized craft. Unlike drywall, which is modular, plaster is a monolithic surface. When a plaster ceiling begins to sag, it doesn’t necessarily need to be replaced. “Plaster injection” systems allow professionals to inject high-strength adhesives through small holes into the gap between the plaster and the lath. The ceiling is then propped up with temporary supports until the adhesive cures, effectively “re-gluing” the ceiling to the house. If large sections are missing, a base coat of “structo-lite” or similar gypsum plaster is applied, followed by a lime-based finish coat to match the original texture and hardness.
The Art of Texture Matching
The most difficult aspect of ceiling repair is not the structural patch, but the aesthetic blending. Most ceilings are not perfectly smooth; they feature textures like orange peel, knockdown, or sand-swirl. Achieving an invisible repair requires the technician to replicate the original spray pattern, pressure, and consistency of the texture. This often involves using specialized hopper guns or hand-trowel techniques. In many cases, a professional will “skim coat” a much larger area than the repair itself to allow the new texture to fade gradually into the old, preventing a “patchwork” appearance.
Sanding and Surface Preparation
Sanding a ceiling is a physically demanding task that requires specialized equipment. Professionals use “pole sanders” or vacuum-shrouded power sanders to minimize the amount of dust that enters the living space. Because light hits a ceiling at an acute angle from windows and light fixtures, even the smallest imperfection will cast a shadow. To combat this, professionals use “critical lighting”—holding a high-intensity lamp parallel to the ceiling—to identify and correct humps or divots before the painting phase begins.
Choosing the Right Finish: Ceiling Paint vs. Wall Paint
Once the repair is structural and smooth, the final step is painting. It is a common mistake to use standard wall paint on a ceiling. Ceiling paints are specifically formulated to be “dead flat.” A flat finish absorbs light rather than reflecting it, which helps to hide the subtle imperfections inherent in large, horizontal surfaces. Additionally, high-quality ceiling paints are formulated with higher viscosity to reduce “spatter” during application. While white is the standard choice to maximize light and make a room feel taller, modern design occasionally calls for “hushed” tones or dark colors to create an intimate atmosphere in dining rooms or theaters.
Popcorn Ceiling Removal and Modernization
Many ceiling restoration projects involve the total removal of outdated “popcorn” (acoustic) textures. This process involves wetting the texture to soften the bond and scraping it away to reveal the raw drywall underneath. Once removed, the ceiling almost always requires a full skim coat of joint compound to smooth out the imperfections that the texture was originally designed to hide. This modernization not only improves the aesthetics of the home but also eliminates a major dust-collector, improving indoor air quality.
Preventing Future Damage
The longevity of a ceiling repair depends on preventative maintenance. Homeowners should regularly inspect the caulking in upstairs bathrooms and ensure that attic insulation is sufficient. Poor attic insulation can lead to “ice damming” in the winter, where melting snow backs up under roof shingles and leaks into the ceiling. Furthermore, maintaining a stable indoor humidity level prevents the wood framing from expanding and contracting excessively, which is the primary cause of recurring cracks in the ceiling corners (crown molding area).
The Economic and Psychological Impact
A damaged ceiling has a disproportionate effect on the perceived value of a property. Prospective buyers often view a water stain or a crack as a sign of systemic neglect, fearing hidden mold or structural instability. Professionally restoring the ceiling not only protects the equity of the home but also has a profound psychological effect on the occupants. A clean, bright, and uniform ceiling creates a sense of “enclosure” and safety, making a space feel larger and more serene.
Conclusion
Ceiling repair is a meticulous discipline that sits at the intersection of home safety and interior artistry. Whether it is the technical challenge of stabilizing a 100-year-old plaster ceiling or the finesse required to match a modern knockdown texture, the goal is always the same: to create a seamless, invisible finish. By respecting the structural needs of the “fifth wall” and utilizing professional-grade materials and techniques, property owners can ensure that their homes remain structurally sound and aesthetically flawless from the top down. A well-restored ceiling is the ultimate finishing touch that defines a truly professional interior.