
Blog
How to Replace a Faulty Electrical Outlet

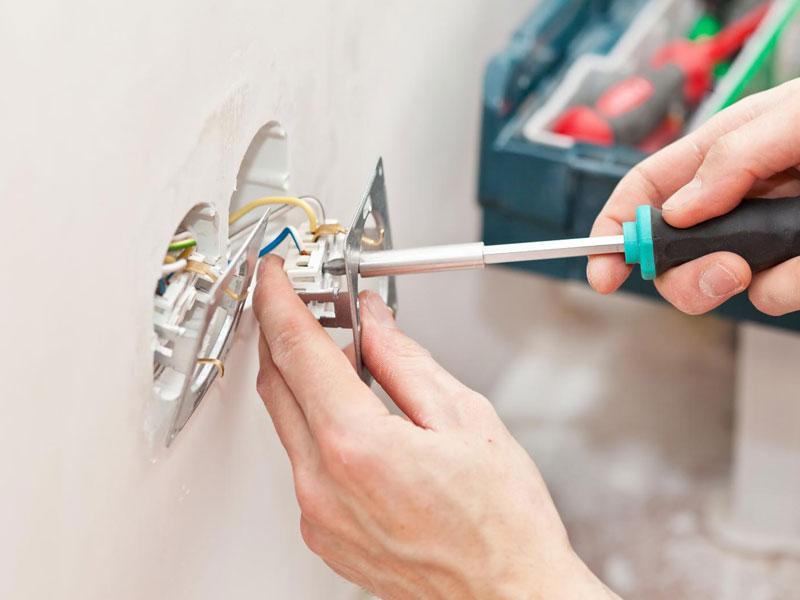
How to Replace a Faulty Electrical Outlet Safely
Electrical outlets are one of the most frequently used components in any home. Over time, outlets can wear out, become loose, or stop working altogether. A faulty outlet can be inconvenient and may also pose a safety risk if not repaired promptly.
The good news is that replacing a standard electrical outlet is a relatively simple DIY repair when done correctly and safely. With a few basic tools and careful attention to safety procedures, most homeowners can complete this repair in under an hour.
This guide will walk you through the process of identifying a faulty outlet and replacing it step by step.
Signs Your Electrical Outlet Is Faulty
Before replacing an outlet, it is important to confirm that the outlet itself is the problem. Common signs of a faulty electrical outlet include:
- Devices plugged into the outlet do not receive power.
- Plugs fall out easily because the outlet feels loose.
- The outlet feels warm or hot to the touch.
- You see burn marks or discoloration around the outlet.
- Sparks appear when plugging in a device.
- The outlet makes buzzing or crackling sounds.
If you notice any of these symptoms, replacing the outlet is usually the safest and most effective solution.
Tools and Materials You Will Need
Before starting the repair, gather the following tools and materials:
- Flathead screwdriver
- Phillips screwdriver
- Voltage tester
- Replacement electrical outlet
- Wire stripper (if needed)
- Electrical tape
- Needle-nose pliers
These tools are commonly available in most household toolkits or can be purchased at any hardware store.
Safety First: Turn Off the Power
Whenever working with electrical components, safety must always come first. Before touching the outlet or any wiring, turn off the power at the circuit breaker panel.
Locate your home’s electrical panel and switch off the breaker that controls the outlet you are replacing. If you are unsure which breaker controls the outlet, you can turn off the main breaker temporarily.
After switching off the breaker, test the outlet by plugging in a device or using a voltage tester to confirm that no electricity is flowing.
Step 1: Remove the Outlet Cover Plate
Use a screwdriver to remove the screw holding the outlet cover plate in place. Carefully lift the plate away from the wall and set it aside.
This will expose the outlet and the mounting screws securing it inside the electrical box.
Step 2: Unscrew the Outlet
Remove the two screws holding the outlet to the electrical box. Once the screws are removed, gently pull the outlet forward to expose the wires connected behind it.
Be careful not to pull too hard, as the wires may be short.
Step 3: Test the Wires Again
Even after turning off the breaker, it is always best to double-check that the wires are not live. Use a voltage tester to confirm that no electricity is present.
If the tester indicates power, stop immediately and turn off the correct breaker before continuing.
Step 4: Identify the Wires
Most electrical outlets have three types of wires connected to them:
- Hot wire: Usually black and carries electricity from the breaker.
- Neutral wire: Usually white and completes the electrical circuit.
- Ground wire: Bare copper or green, providing a safe path for excess electricity.
Take a photo or make a note of how the wires are connected to the outlet. This will help you reconnect them correctly later.
Step 5: Disconnect the Old Outlet
Use a screwdriver to loosen the terminal screws holding the wires. Carefully remove the wires from the outlet.
Some outlets have push-in connections instead of screw terminals. If this is the case, you may need to release the wires using a small flathead screwdriver.
Step 6: Prepare the Wires
Before installing the new outlet, inspect the wires carefully. If the ends are damaged or frayed, use a wire stripper to remove a small section of insulation and expose fresh copper wire.
Using needle-nose pliers, bend the exposed wire ends into a small hook shape. This helps them wrap securely around the outlet terminal screws.
Step 7: Connect the New Outlet
Now connect the wires to the new outlet in the same configuration as the old one.
- Connect the black hot wire to the brass terminal screw.
- Connect the white neutral wire to the silver terminal screw.
- Attach the ground wire to the green grounding screw.
Tighten each screw securely to ensure a solid electrical connection.
Step 8: Secure the Outlet in the Electrical Box
Once the wires are connected, carefully fold them back into the electrical box. Push the outlet into place and secure it using the mounting screws.
Make sure the outlet sits straight and flush with the wall.
Step 9: Reinstall the Cover Plate
Place the cover plate back over the outlet and tighten the screw in the center. Avoid overtightening, as this can crack the plastic plate.
Step 10: Restore Power and Test the Outlet
Return to the breaker panel and turn the power back on.
Plug a device such as a lamp or phone charger into the outlet to confirm that it is working properly.
If everything was installed correctly, the outlet should now function normally.
Common Mistakes to Avoid
While replacing an outlet is a simple repair, there are a few common mistakes that homeowners should avoid:
- Forgetting to turn off the power before starting the repair.
- Connecting the hot and neutral wires to the wrong terminals.
- Leaving loose wire connections.
- Overcrowding wires inside the electrical box.
Taking your time and double-checking your work will help ensure a safe and successful repair.
When to Call a Professional
Although replacing a basic outlet is usually safe for DIY repairs, there are situations where professional help is recommended.
- The wiring appears burned or damaged.
- The outlet box is loose or damaged.
- The outlet is part of a complex circuit.
- You are unsure about the wiring configuration.
If you encounter these issues, contacting a qualified electrician or handyman can help prevent electrical hazards.
Upgrading Your Electrical Outlets
While replacing an outlet, you may also consider upgrading to more modern options such as:
- USB charging outlets
- Ground Fault Circuit Interrupter (GFCI) outlets
- Smart outlets with remote control features
These upgrades can improve safety, convenience, and energy efficiency in your home.
Final Thoughts
Replacing a faulty electrical outlet is a practical DIY home repair that can restore power and improve safety in your home. By following proper safety precautions and carefully reconnecting the wiring, most homeowners can complete this project quickly and confidently.
Regularly inspecting your electrical outlets and replacing damaged ones helps prevent electrical hazards and keeps your home functioning properly. If you ever need help with electrical repairs, installations, or home maintenance, professional services like HandyMaldives can provide reliable assistance.